

PS5 Repair (CFI-1015A): no image on screen, HDMI port not working
Introduction: Symptoms of a faulty HDMI cable on PS5 CFI-1015A
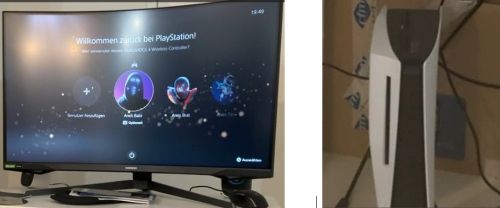
Your PlayStation 5 model CFI-1015A turns on, but the screen remains black with the message "No signal"? In the vast majority of cases, the problem comes from a damaged HDMI port or its solder joints on the motherboard.
A torn cable, a console moved with the cable plugged in, or a shock to the TV: one wrong move is all it takes to bend the internal pins, break the plastic of the connector, or crack the solder points.
- Permanent black screen even though the PS5 starts up (white LED, fan spinning).
- "No signal" message on the TV despite the correct HDMI source being selected.
- HDMI port visibly damaged: bent pins, broken internal plastic, mechanical play.
Diagnosis: Confirm HDMI failure
Step 1: Check the cable and the screen
Before opening the console, we rule out simple causes: faulty cable, bad HDMI port on the TV, compatibility or resolution problem.
- Test with another HDMI cable certified 2.0/2.1.
- Try another HDMI port on the TV, or another screen (PC monitor, second TV).
- Confirm that the correct HDMI source is selected on the display device.
Step 2: Try safe mode
If the image appears intermittently, the problem may be due to a resolution setting or HDMI negotiation (HDCP).
- Completely turn off the PS5.
- Press and hold the Power button until you hear two beeps to start safe mode.
- Try the "Change video output" option and then reduce the resolution or adjust the HDCP.
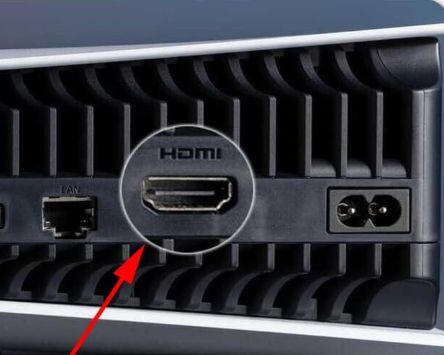
Step 3: Visual inspection of the HDMI port
If no test produces a display, the HDMI port is inspected closely: missing internal plastic, pushed-in pins, connector that moves abnormally when the cable is handled.
Complete teardown of the PS5
Preparing the work area
Disassembling a PS5 CFI-1015A requires a clean, well-lit workspace protected from static electricity. Unplug the console and let it rest for a few minutes before proceeding.
- Anti-static (ESD) mat and wristband recommended.
- Boxes or containers for organizing screws and small parts.
- Photos taken at each stage to ensure safe reassembly.
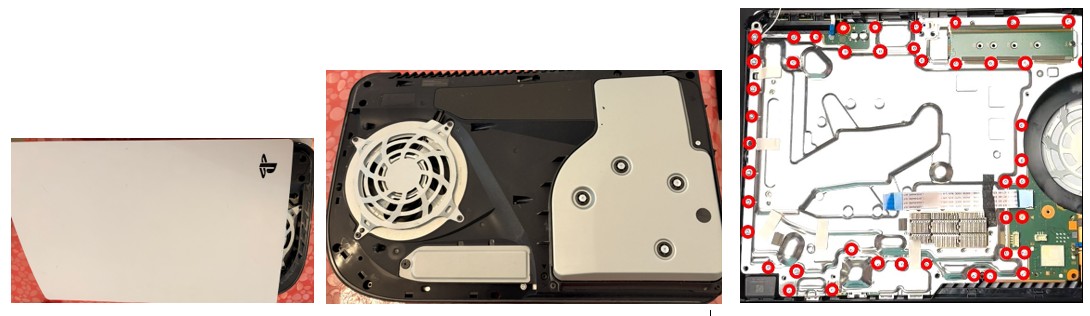
Removal of the cases and the stand
Start by removing the base, then slide the two plastic shells downwards while applying slight pressure, in order to unclip them without twisting them.
Access to the motherboard
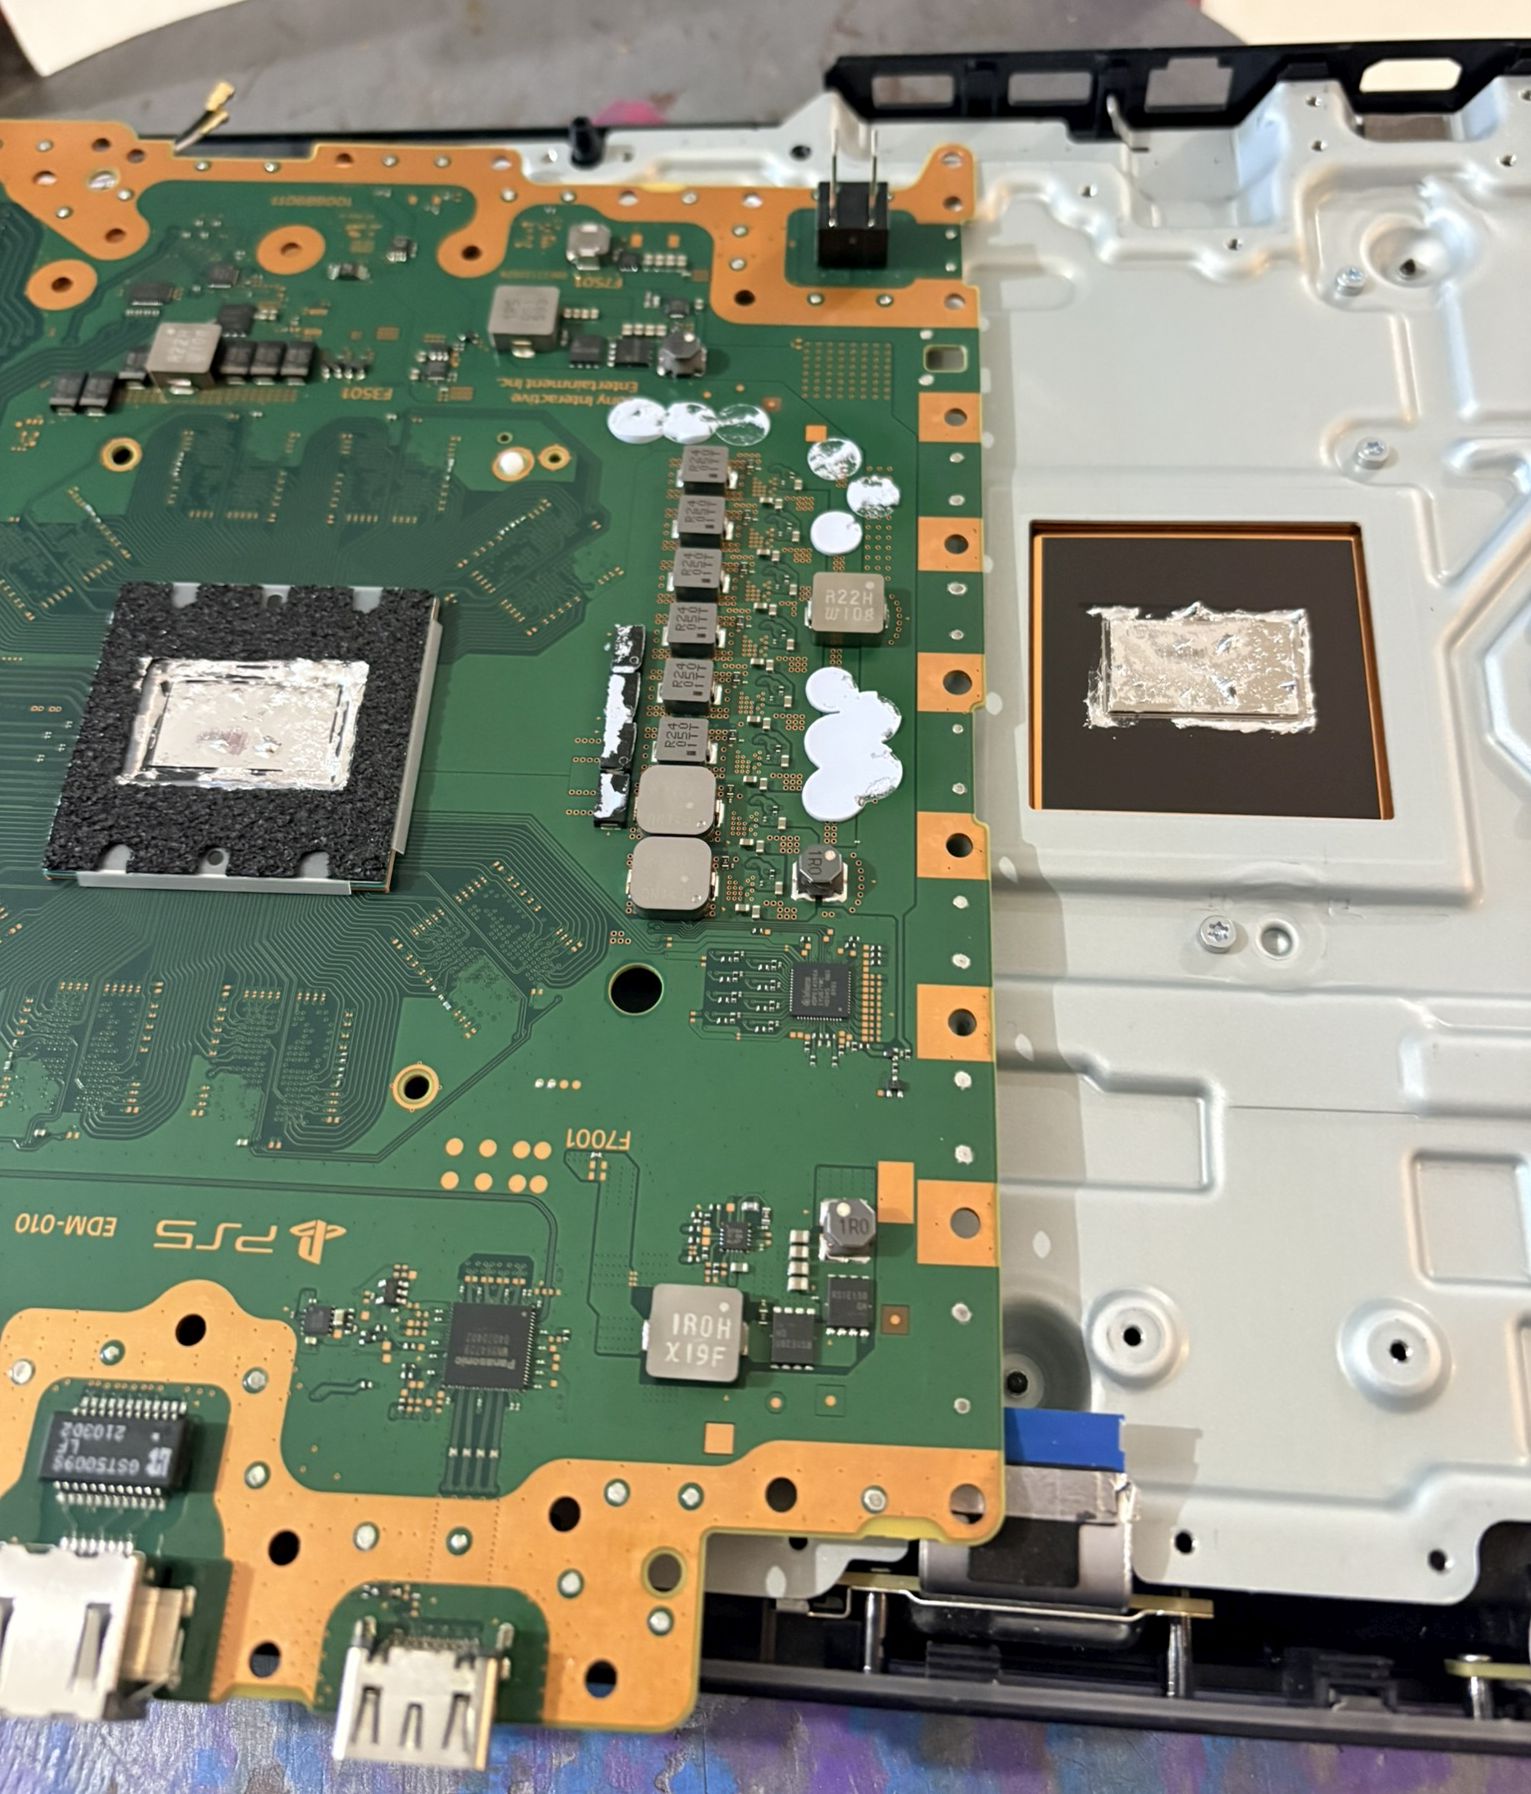
Once the casings are removed, disconnect the ribbon cables, coaxial cables and gradually disassemble the drive, the shields and the heatsink to free the motherboard.
HDMI port repair (replacement)
Area protection and preparation
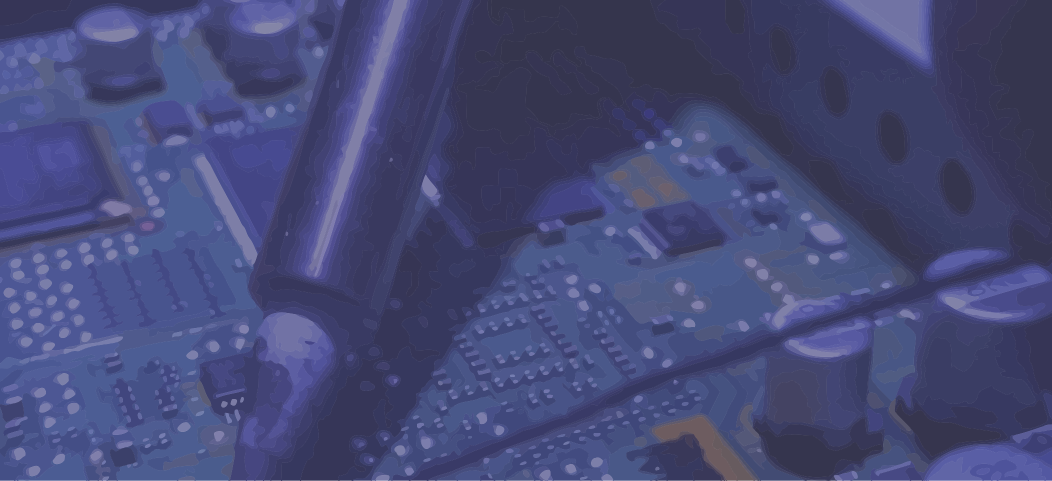
We first protect the sensitive components around the HDMI port with Kapton tape, then apply quality flux to all the solder joints to be desoldered.
Desoldering the old HDMI port
Depending on the condition of the connector, desoldering can be done at a hot air station with preheating of the board, to avoid tearing off traces or pads.
- Gradually heat the back of the card until the tin melts.
- Grasp the port with pliers as soon as the tin is liquid, without forcing it.
- Clean the holes and the area with desoldering braid and flux.
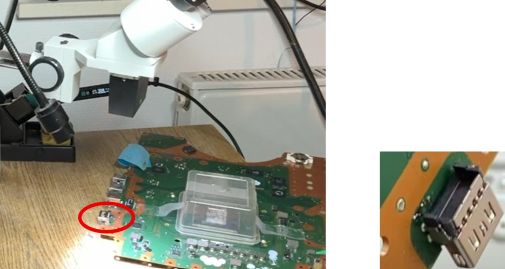
Soldering of the new HDMI port
The new HDMI connector, compatible with PS5 CFI-1015A, is positioned and then soldered first by its anchor tabs, then by the signal pins one by one, under a microscope.
- Perfect alignment of the connector with the holes on the motherboard.
- Fine and controlled soldering to avoid bridging between pins.
- Final inspection with a magnifying glass or microscope.
Tools, consumables and protective equipment used
- Torx T8/T9 screwdrivers and precision Phillips screwdrivers.
- Hot air station and soldering iron with fine tip (adjustable temperature).
- Desoldering braid, desoldering pump, no-clean flux.
- Tweezers, plastic spudgers, holding pliers.
- Magnifying glass or digital microscope for inspecting welds.
- ESD mat, anti-static wrist strap, Kapton tape.
- Isopropyl alcohol and an anti-static brush for final cleaning.
- New HDMI connector compatible with PS5 CFI-1015A.
Console testing and reassembly
Testing the bare metal before complete reassembly
Before reassembling all the shielding and casings, we perform a power-up test with the board in place and the essential elements reconnected (power supply, fan, HDMI).
If the PlayStation logo appears immediately and the image is stable, the HDMI repair is validated and we proceed to the final reassembly.
Reassembly and final testing
The console was then reassembled with a thin layer of new liquid metal on the CPU, all the ribbon cables reconnected and the casings put back in place, then tested on several games and resolutions.
HDMI repair prices for PS5 CFI-1015A and appointment booking
PS5 HDMI Repair Package
At luxjim.com, the repair of the PS5 HDMI port (CFI-1015A) is offered as a package, including the new connector, microsoldering, full testing and workshop warranty.
- PS5 HDMI diagnostic : €50 (free if you accept the repair).
- PS5 HDMI port replacement : from €100 including VAT.
- Average lead time : 1 to 24 hours depending on workshop workload.
How to entrust us with your PS5?
- Fill out the form below or contact us by phone/email.
- Bring your console in by appointment or send it carefully packaged.
- We carry out the diagnosis, confirm the quote, then proceed with the repair.
Difficulty, advice and professional opinions
Replacing an HDMI port on PS5 is an advanced microsoldering operation on a multilayer motherboard: without suitable equipment and experience, the risks of irreversible damage are significant (pads torn off, traces cut, APU overheating).
If your console is valuable to you, the safest option is to entrust it to a specialist workshop equipped with a hot air station, microscope and ESD tools, rather than attempting a repair "at home".
At luxjim.com, our goal is to extend the lifespan of your PS5 while avoiding a complete console replacement, which is more expensive and less environmentally friendly.

0 Comments