

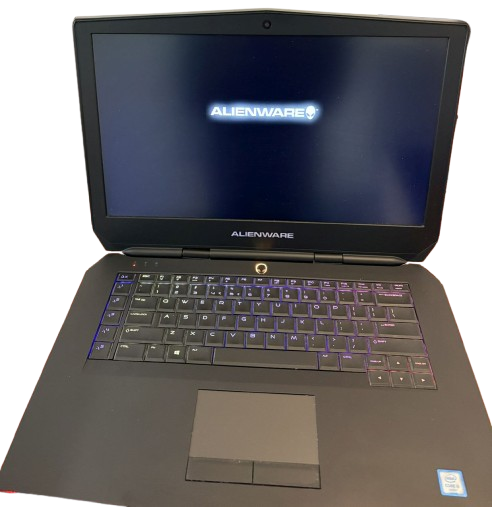
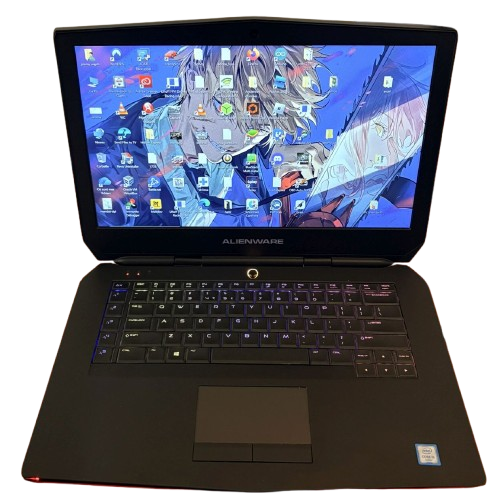
Alienware 15 R2 : Display freezes after 5 minutes • CPU / GPU overheating
Does your Alienware 15 R2 freeze after a few minutes, with the mouse, keyboard, and USB ports becoming unresponsive? This symptom is very often linked to overheating of the CPU/GPU combination and a dirty or poorly dissipated cooling system.
In this article, I present a real case of repair carried out in my workshop in Luxembourg: diagnosis, complete disassembly, cleaning, replacement of thermal paste and professional advice.
1. Symptoms and diagnosis of an Alienware 15 R2 that freezes
The problem reported by the customer: after 3 to 5 minutes of use under Windows, the display freezes completely, the mouse stops moving, the keyboard does not respond and even the USB devices become inoperative, forcing a restart.
After an initial software check (drivers, Windows updates, antivirus) and a test in safe mode, the freezes systematically recur as soon as the CPU or GPU is used, which clearly points to a problem of overheating or poor heat dissipation.
Basic checks
- Fans that ramp up very quickly even under light use.
- The chassis gets hot around the keyboard and rear grilles after only a few minutes.
- No software error message before the complete system failure.
- Abnormally high CPU/GPU temperatures during stress testing, with peaks approaching the manufacturer's safety limit.
The diagnosis: saturated cooling system (dust), dry thermal paste on CPU / GPU and possibly worn thermal pads, making dissipation insufficient on this Alienware 15 R2 model already known to overheat.
2. Preparations and safety instructions
Before opening an Alienware 15 R2, it is essential to prepare a clean, well-lit workspace and to plan storage for the numerous screws and cables of this high-end chassis.
Tools used
- Precision screwdrivers (Phillips cross-head, possibly Torx depending on the series).
- Spudger and plastic pry tool to unclip the hood without damaging it.
- Fine anti-static tweezers for handling ribbon cables and connectors.
- Dry air blower or compressed air can for cleaning fans and radiators.
- Isopropyl alcohol (90% or more) and lint-free wipes to remove old thermal paste.
- New high-quality thermal paste (like Arctic MX, Noctua, etc.).
- Anti-static mat or wristband recommended to limit ESD risks.
Precautions
- Completely turn off the laptop and unplug the power supply and all peripherals.
- Press and hold the power button for 10 seconds to discharge the capacitors.
- Work without rushing, noting the location of the screws of different lengths.
3. Disassembly of the Alienware 15 R2
The Alienware 15 R2 requires relatively advanced disassembly to fully access the CPU/GPU cooling system and properly clean the fans and radiators.
3.1. Removing the lower cover
- Turn the laptop upside down, bottom cover facing up, onto a flat, rigid surface.
- Remove the screws from the hood (often visible around the perimeter) noting their position.
- Carefully unclip the cover using a plastic tool, working around it without forcing it to avoid breaking the clips.
3.2. Disconnecting the battery and modules
- Locate the battery connector on the motherboard and disconnect it by pulling parallel to the PCB, never upwards.
- If necessary, remove the battery pack after removing its fixing screws.
- Remove SSDs, HDDs, Wi-Fi modules and RAM if they obstruct access to the cooling system.
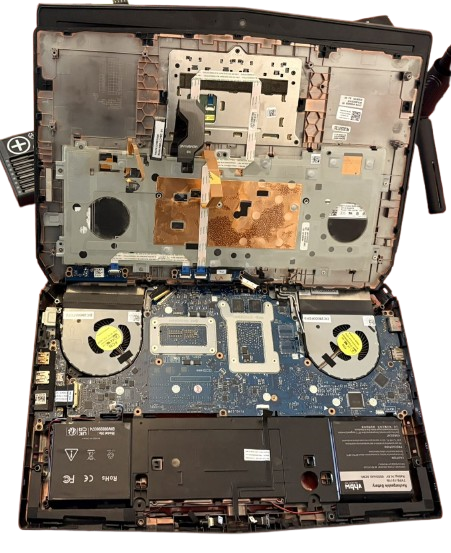
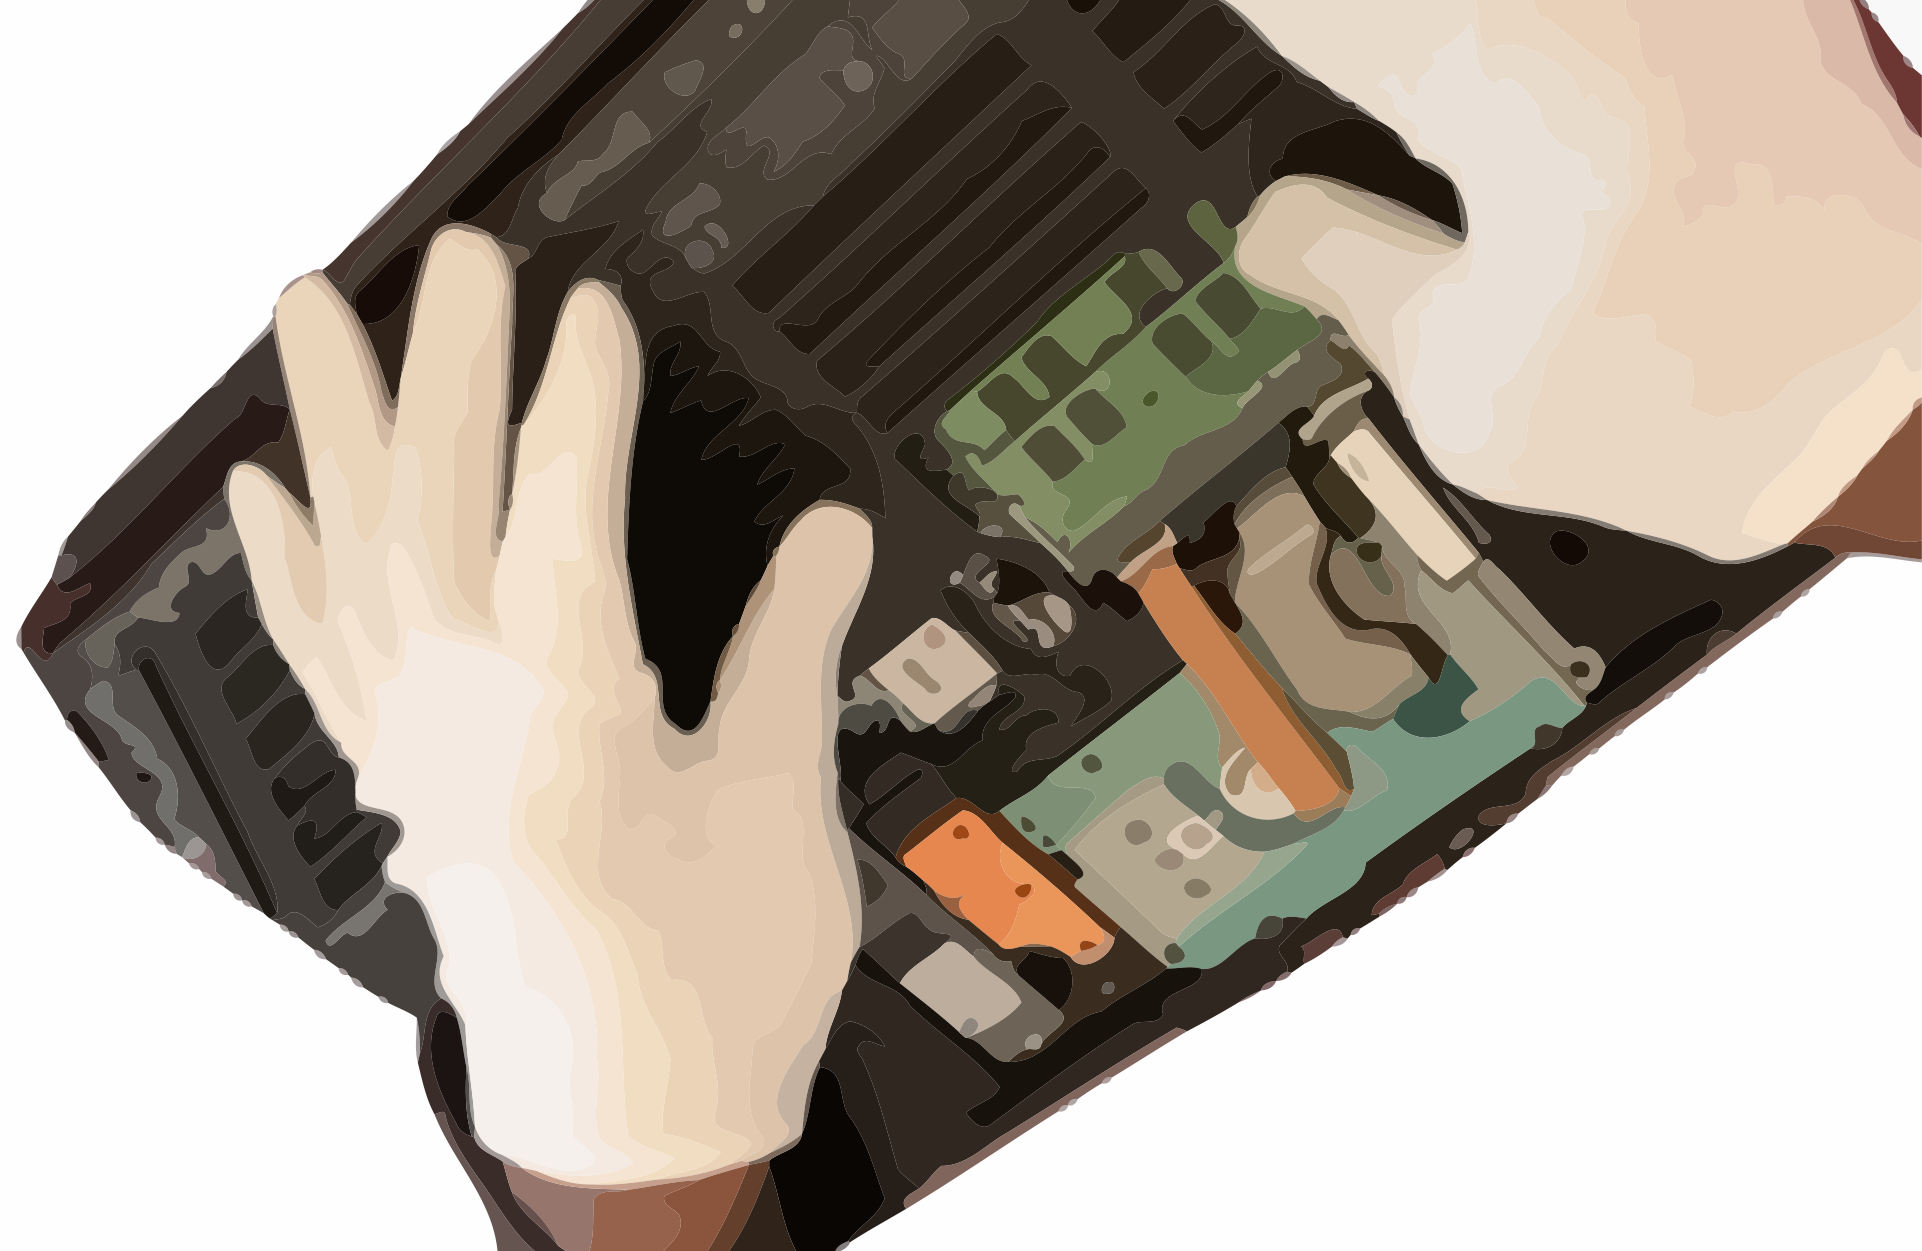
3.3. Access to the motherboard and cooling system
Depending on the configuration, it is sometimes necessary to remove the keyboard, the top case or certain cables to completely free the motherboard before the fan and heat pipe assembly can be removed.
- Carefully disconnect the cables from the keyboard, touchpad and ports.
- Remove the marked screws that hold the motherboard in place, then carefully lift the board.
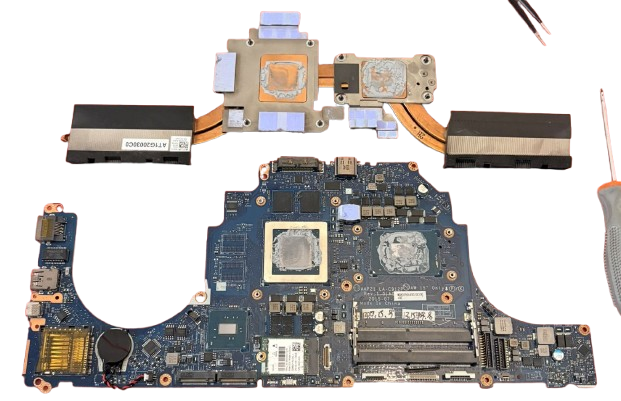
- Identify the heatsink block that covers the CPU and GPU, connected to the fans by heat pipes.
4. Repair of the CPU / GPU cooling system
The key phase to resolve overheating issues is to clean the fans, unclog the heatsinks, and replace the thermal paste on the CPU and GPU of the Alienware 15 R2.
4.1. Removal of the radiator and fans
- Disconnect the fan connectors from the motherboard.
- Remove the small screws that attach the fans to the chassis and then set them aside.
- Unscrew the heat sink block following the numbered order indicated around the CPU and GPU to gradually release the pressure.
- Gently relieve the heat pipes and lift the entire radiator assembly upwards, without twisting the tubes.
4.2. Cleaning of fans and radiators
- Hold the fan blades with a finger and blow with compressed air to remove dust without running it at very high speed.
- Dust off the radiator fins (on the side with the exhaust grilles) until proper airflow is restored.
- Clean the chassis around the cooling system to prevent dust from accumulating too quickly.
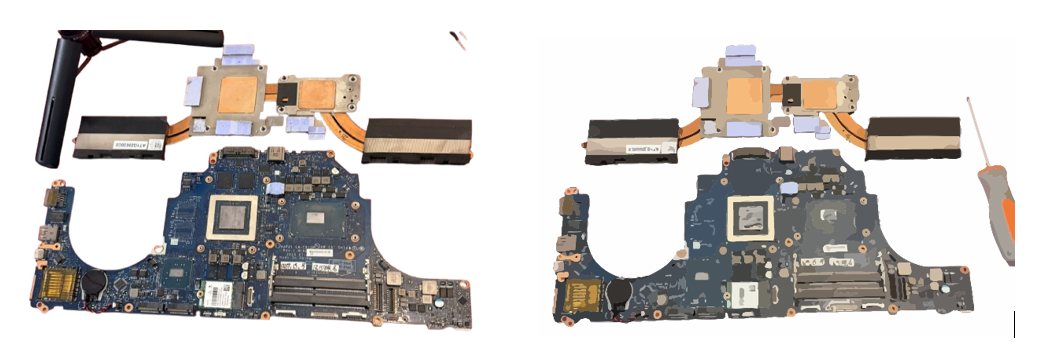
4.3. Replacing the thermal paste (repaste)
- Using a lint-free cloth dampened with isopropyl alcohol, carefully remove the old thermal paste from the surface of the CPU and GPU.
- Also clean the copper base of the radiator until it is clean and shiny.
- Check the condition of the thermal pads on the VRMs and video memories: if they are crushed or damaged, replace them with pads of the same thickness (often 1 mm on this type of machine).
- Apply a small dab of thermal paste to the center of the CPU and GPU (amount equivalent to a grain of rice or a pea depending on the surface).
- Carefully place the radiator back in position, making sure to align the screws properly, without sliding it to avoid creating air bubbles.
- Tighten the screws in a crisscross pattern, following the numbered order, to distribute the pressure and thermal paste evenly.
4.4. Temperature Check
After partial reassembly (motherboard, battery, radiator, fans, but before final closure), a first start-up allows monitoring and stress test tools to be launched to check thermal stability.
- CPU/GPU temperatures are significantly lower under load than before the intervention.
- More gradual fan speeds, without instantaneous increases to maximum.
- The blockages disappear after 3 to 5 minutes of standard use.
5. Reassembly and final testing
Once the temperatures have returned to control, the Alienware 15 R2 is completely reassembled following the reverse order of disassembly, taking care not to forget any ribbon cables or screws.
5.1. Step-by-step reassembly
- Reconnect all connectors (fans, screen, keyboard, touchpad, ports, etc.).
- Reinstall the battery, SSD/HDD, Wi-Fi and RAM to their original locations.
- Replace the lower cover and screw all the screws back in to the correct length.
5.2. Stability Tests
- Full boot under Windows, then intensive use for at least 30 to 60 minutes (gaming, video rendering, benchmarks) to validate stability.
- Real-time temperature monitoring to ensure that temperatures remain within normal ranges for this Alienware model.
- Checking for the absence of freezes, reboots, frozen screens or screen artifacts.
6. Difficulty, advice and professional opinions
Repairing an Alienware 15 R2 that freezes due to CPU/GPU overheating is not a simple fan dusting operation: it is an advanced disassembly that requires method, patience and a minimum of hardware experience.
For a novice user, the risk is breaking a chassis clip, tearing off a keyboard ribbon cable, or applying too much thermal paste and damaging the thermal contact, or even damaging the motherboard by static electricity.
In the workshop, this type of intervention often makes it possible to significantly extend the lifespan of the Alienware 15 R2, reduce fan noise and restore stable performance in games or production.
If you do not feel comfortable with this level of disassembly, I strongly recommend that you entrust your machine to a professional: you will avoid unpleasant surprises and benefit from a complete diagnosis (component testing, BIOS update, general check).
Based in Schifflange, Luxembourg, I offer a repair and maintenance service for Alienware laptops and other gaming laptops, with a transparent quote before any work begins. Feel free to contact me via the contact form on luxjim.com for a personalized diagnosis.


0 Comments